Source :- https://compile.blog/imgur-api-image-uploader/
See Example :- https://sh20raj.github.io/Gurimg/
Video Documentation :- https://youtu.be/Gh1ngxdIXAk {% youtube https://youtu.be/Gh1ngxdIXAk %}
Codepen Demo :- https://codepen.io/SH20RAJ/pen/QWqoOrL
Imgur is great for hosting images for free.
There are other platforms like FileStack, Cloudinary, and UploadCare; but among all Imgur is the best for uploading images because it’s free for non-commercial usage.
And, there is a simple way to set up the Imgur API to upload images directly from the local disk.
Here’s how to do it:
Imgur API Image Uploader
Let’s break it into simple baby steps:
Step #1 – Get the Imgur API
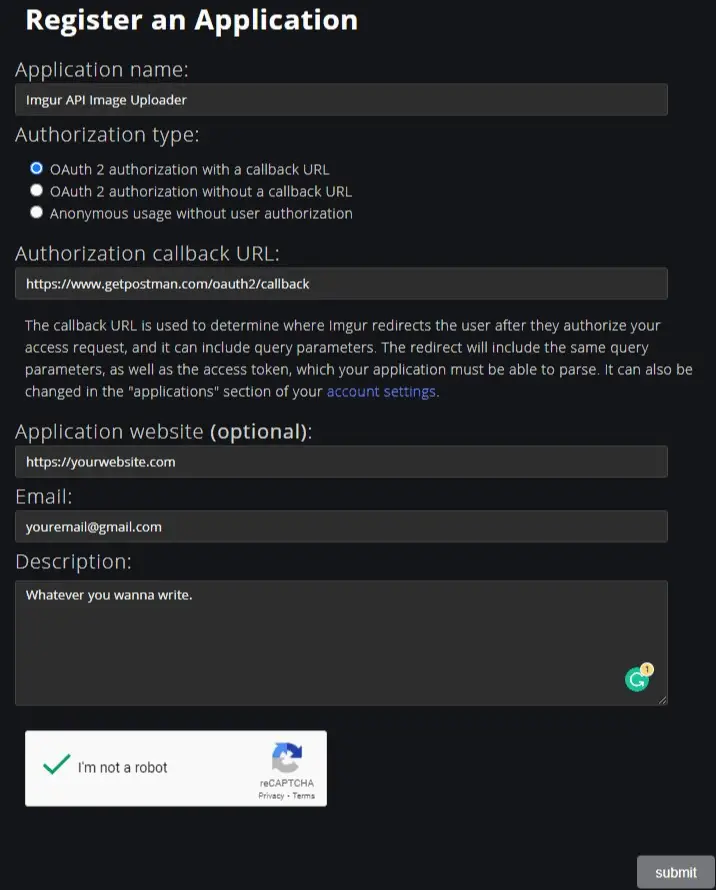
First of all, you will have to register your application with the Imgur API. Go to the API page and register an application. It should look like the below screenshot:

Fill in the following details in the respective fields:
- Application name: whatever you would like to name it
- Authorization type: OAuth 2 authorization with a callback URL
- Authorization callback URL: -https://www.getpostman.com/oauth2/callback
- Application website: your website address (it’s optional)
- Email: your email address
- Description: however you’d like to describe your app
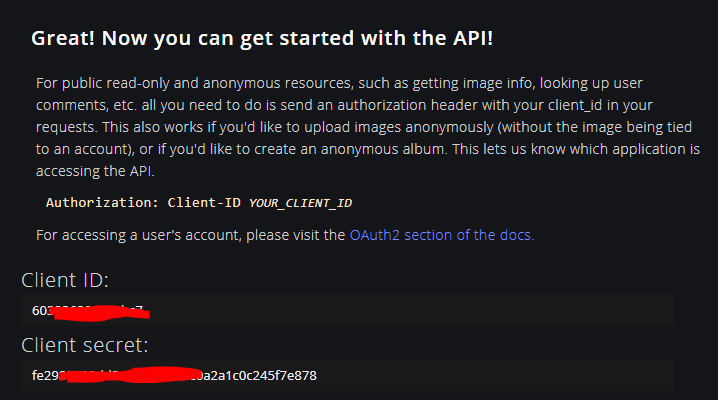
As soon as you submit, you will be presented with the Client ID and Client Secret, save both somewhere.

It should look much like the screenshot above.
Step #2 – Create the Uploader
Well, most of the work is done by now.
You just have to create an HTML file, copy the below code and save.
And yes, don’t forget to replace the YOUR_CLIENT_ID with the real Client ID that you saved in the Step #1.
<!DOCTYPE html>
<html lang="en">

<head>
    <meta charset="UTF-8">
    <meta name="viewport" content="width=device-width, initial-scale=1.0">
    <title>Imgur API Image Uploader</title>
</head>

<body>
    <img src="https://i.imgur.com/U7afLiO.png" id="img" height="200px">
    <br />
    <input type="file" id="file">
    <br />
    <strong>
        <p id="url"></p>
    </strong>

    <script>
        const file = document.getElementById("file")
        const img = document.getElementById("img")
        const url = document.getElementById("url")
        file.addEventListener("change", ev => {
            const formdata = new FormData()
            formdata.append("image", ev.target.files[0])
            fetch("https://api.imgur.com/3/image/", {
                method: "post",
                headers: {
                    Authorization: "Client-ID YOUR_CLIENT_ID"
                },
                body: formdata
            }).then(data => data.json()).then(data => {
                img.src = data.data.link
                url.innerText = data.data.link
            })
        })
    </script>

</body>
</html>
Voila! Your Imgur API Image Uploader is ready.
Try opening the HTML file in your browser and test it out by uploading any image, it should return you the URL of the uploaded image.
That’s it.
And yes, either you can run the HTML file in the browser directly from the local disk, or you can upload it on Netlify or Github Pages.
If you’ve got any related query, feel free to let me in the comments.
https://dev.to/sh20raj/imgur-api-image-uploader-using-javascript-html-4b1c
Comments
Post a Comment